Irrometer Watermark Series: Construction Guide
This publication series provides information and recommendations pertaining to the Irrometer Watermark 200SS, a granular matrix sensor commonly used in Mississippi for scheduling irrigation. Future publications will discuss other types of soil moisture sensors. Users should choose tools that best fit their needs.
Introduction
This publication provides a step-by-step guide to proper Watermark sensor construction. Following these steps will make the sensors easier to install at the intended depths and easier to remove at the end of the season.
Preparation
The tools and supplies pictured below will be used. Fifteen feet of sensor wires is usually convenient.
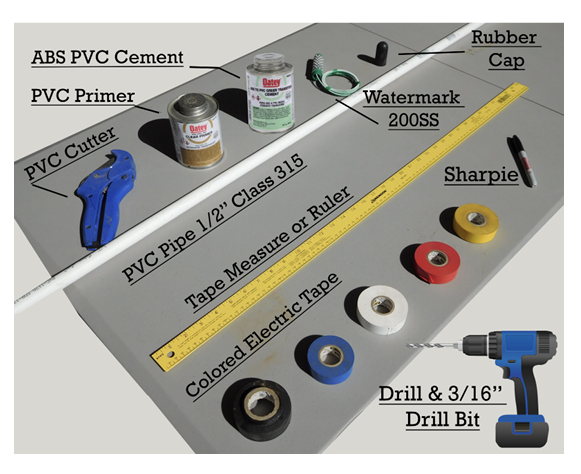
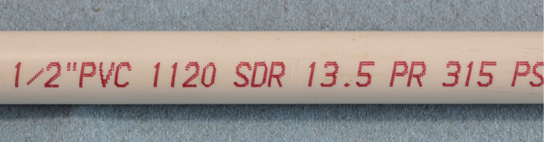
One set of 6-inch, 12-inch, 24-inch, and 36-inch sensors will require one 10-foot stick of ½-inch Class 315 PVC pipe. Select the correct PVC specifications to avoid frustrations later.

ABS-PVC transition cement is best for joining the ABS sensor collar to a primed PVC section. Using a different cement can increase the risk of sensor-PVC separation during removal.
Assembly
Step 1: Using the PVC cutter, cut a PVC length that is 10 inches longer than the intended sensor depth to simplify sensor removal. Following the color code below for that sensor depth, wrap a ring of colored electrical tape 4 inches from one end of the cut PVC section.
|
Sensor depth |
PVC length |
Tape color |
|
6" |
16” |
blue |
|
12" |
22” |
white |
|
24" |
34” |
red |
|
36" |
46” |
yellow |
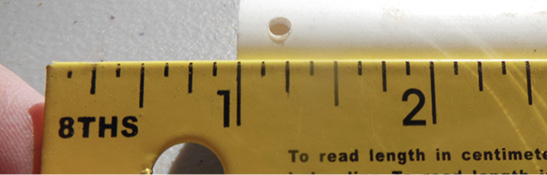
Step 2: Using the electric drill and a 3⁄16-inch drill bit, make a weep hole ¼ inch from the untaped bottom end of the PVC section.

Step 3: Apply PVC primer at least ½ inch inside the bottom end of the PVC section. Be ready for drips.


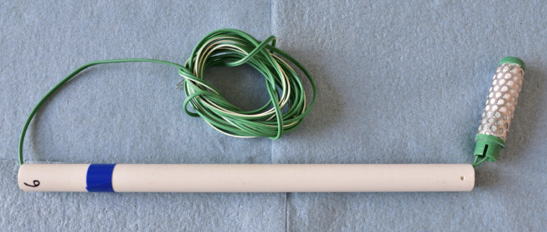
Step 4: After a few minutes of drying, thread the sensor wires from the bottom end of the PVC section to the top end until the sensor collar meets the bottom end. Bundle the extra wire.

Step 5: Carefully apply an appropriate amount of ABS-PVC transition cement to the sensor collar.

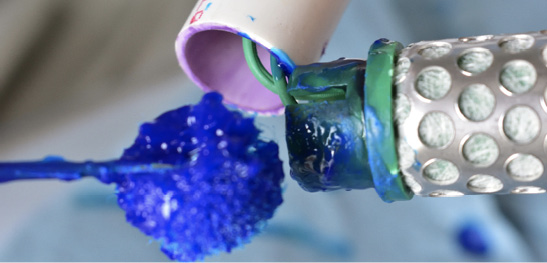
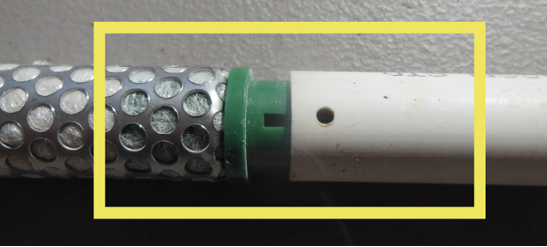
Step 6: While aligning the sensor weep slot with the drilled weep hole, push the sensor collar fully into the bottom end of the PVC section.
Ensure that the weep hole will allow water to drain out.

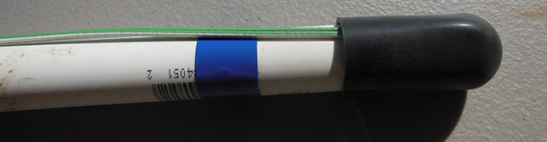
Step 7: Wrap a ring of black electrical tape so that the distance between the bottom of the tape and the middle of the attached sensor equals the intended sensor depth. After installation, the bottom edge of the black electrical tape should be flush with the ground.
Placing a rubber washer around the PVC section can reduce water flow down the installation hole.

Step 8: Slide a rubber cap onto the top end of the PVC section. The construction is now complete!
For more information, please contact Extension Irrigation Specialist Drew Gholson at drew.gholson@msstate.edu or (662) 390-8505.
This publication is a contribution of the National Center for Alluvial Aquifer Research (NCAAR), the Mississippi State University Extension Service, and the Row-Crop Irrigation Science Extension and Research (RISER) initiative. NCAAR is supported by the Agricultural Research Service, United States Department of Agriculture (USDA), under Cooperative Agreement number 58-6001-7-001. RISER is supported jointly by Mississippi Soybean Promotion Board, Mississippi Corn Promotion Board, Mississippi Rice Promotion Board, Cotton Incorporated, Mississippi Peanut Promotion Board, and by USDA’s Natural Resources Conservation Service under Conservation Innovation Grant number NR203A750008G007.
The information given here is for educational purposes only. References to commercial products, trade names, or suppliers are made with the understanding that no endorsement is implied and that no discrimination against other products or suppliers is intended.
Publication 3538 (POD-09-24)
By Jacob Rix, former Extension/Research Associate; Himmy Lo, PhD, Assistant Extension/Research Professor, Delta Research and Extension Center; Drew Gholson, PhD, Assistant Professor and Coordinator, NCAAR, and Mark Henry, Extension Associate II, Delta Research and Extension Center.

The Mississippi State University Extension Service is working to ensure all web content is accessible to all users. If you need assistance accessing any of our content, please email the webteam or call 662-325-2262.