Construction of a Low-Cost Coffer Dam for Grain Bin Rescue
With the increase in acres planted in grain crops in Mississippi, on-farm grain storage has also increased. Unfortunately, this also increases the likelihood of grain bin entrapment.
The best kind of grain bin rescue is one that does not have to happen—using preventive measures and common sense, these kinds of emergencies can be avoided. If someone becomes entrapped in grain, having access to the right kind of equipment and the knowledge of how to properly remove the person is life-saving.
The information in this publication is limited to the construction of a portable, affordable coffer dam for use in grain bin rescue. A coffer dam is designed to keep grain from flowing against the victim and to create a space around the victim from which grain can be removed.
There are excellent commercial products designed specifically for this function, but they can be quite costly. You can also improvise and make a coffer dam with barrels or large trash cans with the bottom removed, or from any number of other materials.
Having purpose-built equipment available and training with it before an emergency will save valuable time and lives. A method for constructing a low-cost device for grain storage and handling facilities is presented below.
Note: Specific instructions for grain entrapment rescue are not given or implied in this document.
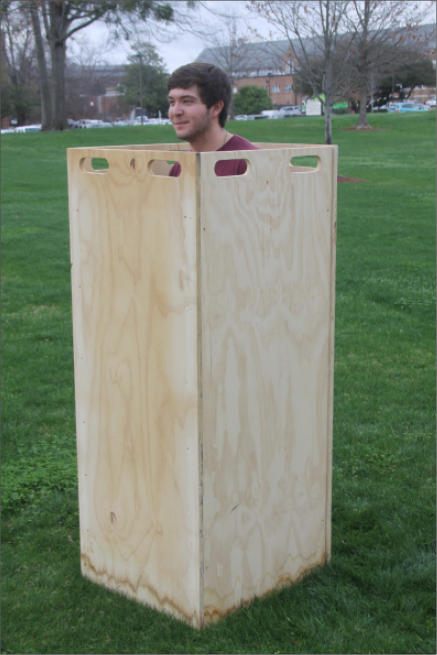
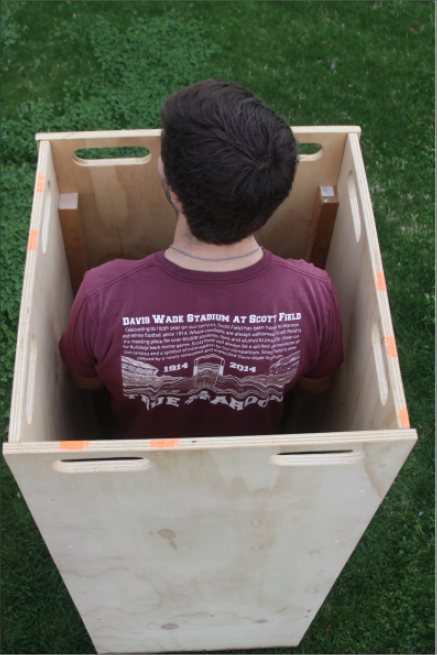
Plywood Coffer Dam
Materials
- (2) 4-by-8-foot sheets of hardwood plywood (oak, cabinet grade, 3/4 inch in thickness)
- (2) 2-by-2-inch sticks structural lumber (10-foot preferred, 8-foot optional)
Equipment
- Table saw or circular saw
- Drill
- 2-inch spade bit/hole saw or pilot-hole bit for jig saw
- Jig saw or reciprocating saw with wood-cutting blades
- Router or sander (optional)
- Chalk line
- Scissors
- Pencil
- 2 small nails
- 2-inch #10–12 wood screws
- Wood glue
Instructions
-
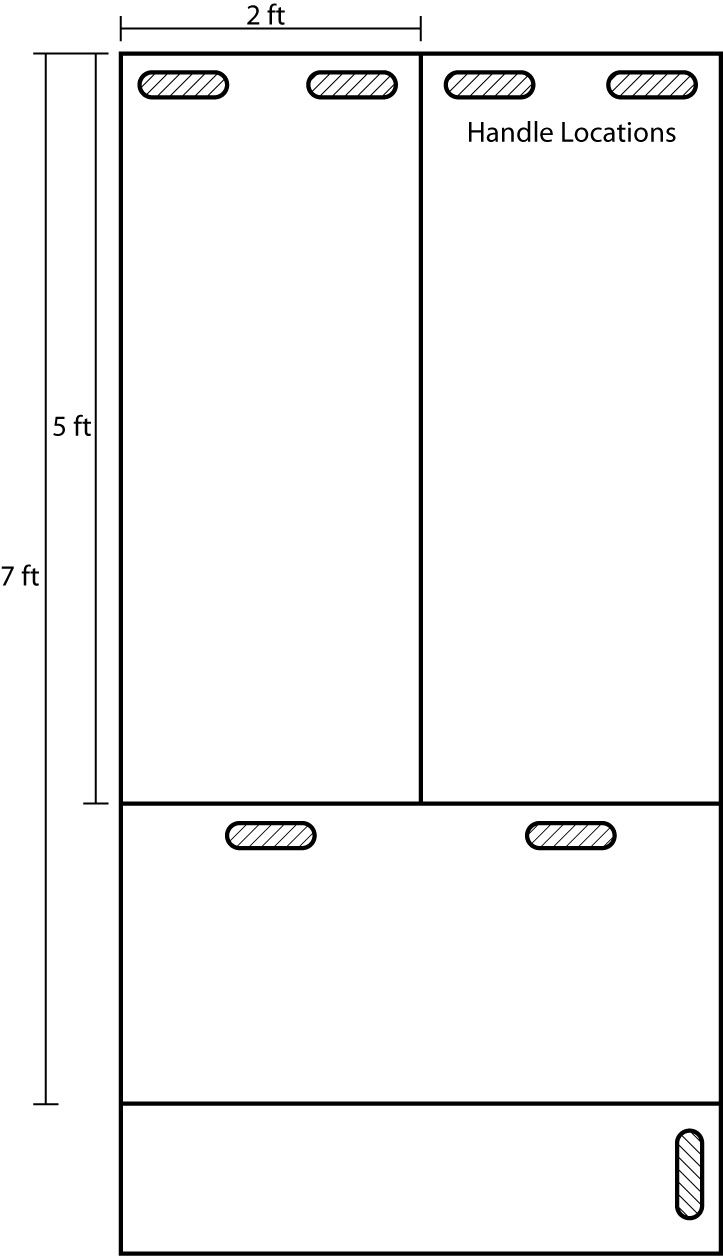
See included plywood cutting layout (Figure 4).
-
Mark cutting lines on plywood sheets using supplied dimensions, ignoring handles.
-
Cut plywood sheets along center of the lines. Both sheets should be cut to the same dimensions.
-
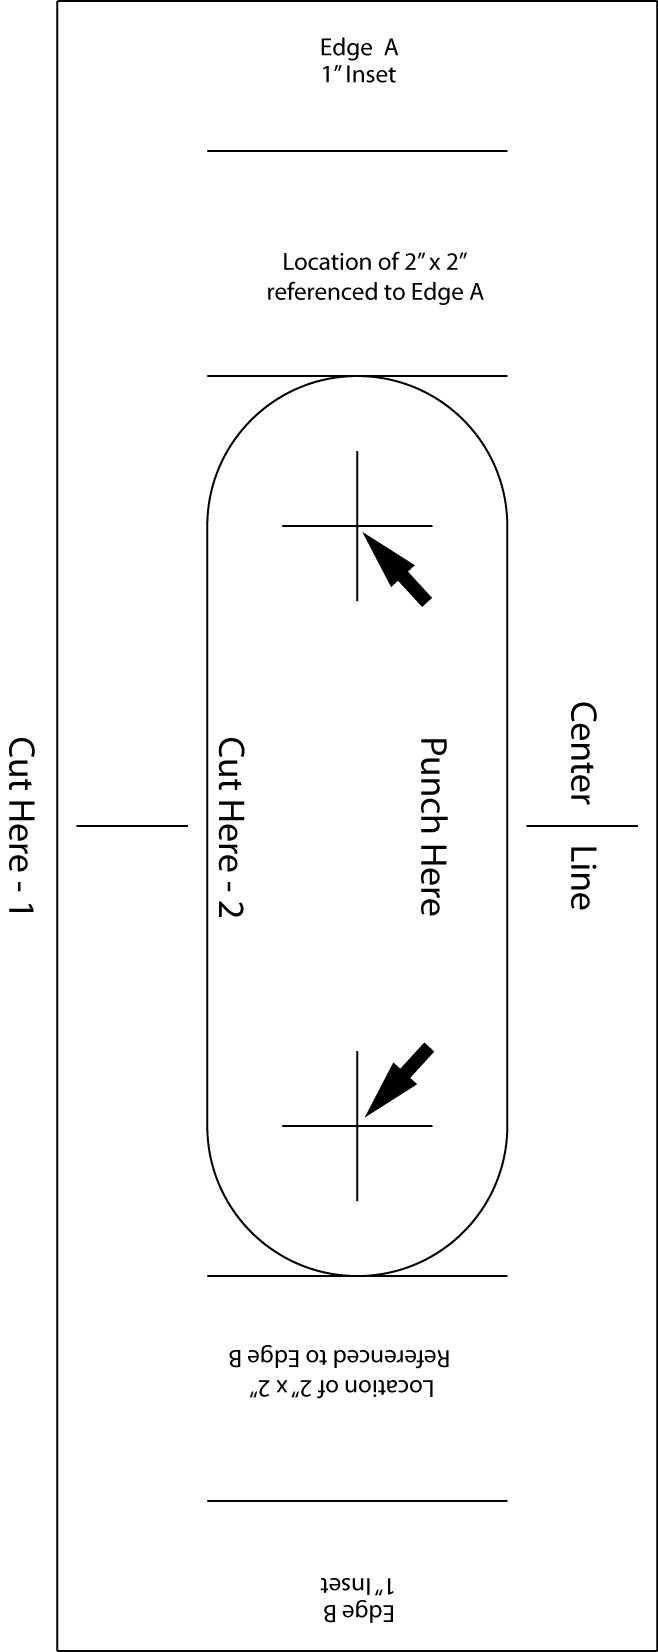
See included handle cutting layout (Figure 3). This layout is true-scale and can be cut out to use as a guide while cutting handles in the wood.
-
Using scissors, cut along the line labeled “Cut Here – 1.”
-
Align paper edges (or center line) with edges of a piece of cut plywood. Using the factory edges is preferred when possible.
-
Using a nail, punch through the paper in the locations marked “Punch Here” into the wood to mark handle locations.
-
Repeat steps 6 and 7 for all handle locations indicated in Figure 3.
-
Using scissors, cut along line labeled “Cut Here – 2” on handle cutting layout.
-
Using two small nails, align handle layout to the two marks previously made in the wood.
-
Trace the handle shape onto the wood.
-
Repeat steps 6 and 7 for all handle locations indicated in Figure 4.
-
Using a 2-inch spade drill bit or hole saw, drill through the wood at the center punch marks previously made.
-
Cut out remaining material by following lines with jig saw or reciprocating saw.
-
Alternative method: Drill pilot hole in handle cut-out area and follow lines with saw.
-
Cut 2-by-2-inch lumber pieces in half, ending with four 4- or 5-foot sections.
-
Using wood glue and wood screws, attach the 2-by-2-inch pieces to the surface of two 2-by-5-foot plywood pieces. Inset 1 inch from the 5-foot edge, using a minimum of one screw every 12 inches.
-
Optional: Smooth edges by sanding or using router with small round-over bit.
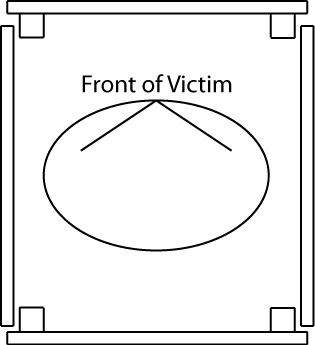
When complete, you should have eight sections of plywood: two 2-by-5-foot sections with 2-by-2-inch runners attached, two plain 2-by-5-foot sections, two 2- by-4-foot sections, and two 1-by-4-foot sections. The two 2-by-5-foot pieces with runners should be placed to the front and back of the entrapment victim, and the plain 2-by-5-foot sections should be placed to the sides of the victim.
Sliding the side pieces along the 1-inch inset on the front and back pieces should prevent the coffer dam from collapsing in toward the victim. The two 2-by-4-foot pieces can be used to walk on and prevent grain shifting toward the victim. They can also be used to prevent grain from topping the coffer dam during rescue. The 1-by-4-foot pieces can be used to support the dam or the 2-by-4-foot pieces.
All of these pieces should have handles in them. The handles provide rigging points should these pieces need to be hoisted to the top of a grain bin, and make maneuvering easier.
Publication 2598 (POD-06-23)
Reviewed by Jessica Drewry, PhD, Assistant Professor, Agricultural and Biological Engineering. Revised by John Linhoss, PhD, former Extension Associate, Daniel Chesser, PhD, Assistant Professor, and Wes Lowe, PhD, Assistant Professor, Agricultural and Biological Engineering, from the original edition by Jason Ward, former Extension Associate, Agricultural and Biological Engineering; Bill Harp, Chief of Operations, Safety and Technical Rescue Association (SATRA); and Herb Willcutt, former Extension Professor, Agricultural and Biological Engineering.
The Mississippi State University Extension Service is working to ensure all web content is accessible to all users. If you need assistance accessing any of our content, please email the webteam or call 662-325-2262.


