P3247
Creating an Evergreen Swag
The holiday season calls for lively evergreen decorations. The front door is often the exterior focal point of the home, so it makes good sense to draw viewers’ eyes to it and provide a sense of welcome to guests.
This publication provides detailed instructions on how to make an evergreen swag—a cluster of mixed greenery that can be accented with ribbon, berries, pine cones, and pods. It is a classic, just like a wreath or a garland, and it is easy to adapt the design to other types of foliage and seasons once you master the basics. Designs like this can retail for $50 to $100 and are well worth the retail value because of their rugged beauty.
This project requires just a few, inexpensive materials, along with clipped evergreen foliage and pine cones from the landscape. The base for the design, a fresh floral foam cage, can be purchased from craft stores or online, or you can save some money and make your own. The commercially produced cage contains fresh flower foam encased within a hard plastic basket. This basket keeps the foam from falling apart and provides a way to suspend the finished design.
Most of the time, fresh floral foam can be used only once. Once it is hydrated and allowed to dry out, it loses its ability to effectively rehydrate. On the other hand, if only foliage is arranged in it, it can often be successfully reused. But keep in mind that reused foam can lose its integrity and fall apart after having many holes punched into it from stem placements.
Cut greenery is durable and long-lasting, so providing it with a water source, even if it is substandard, can improve its display duration.
This design takes around 1 hour to create, plus the time to gather materials. If you make your own floral foam cage, overall design may take up to 2 hours.
To make this design, you will need:
Tools
- Pruning shears
- Wire cutters
Supplies
- Fresh flower foam cage unit (3 inches x 4.25 inches x 3.25 inches)
or
- Half-block fresh flower foam
- Waterproof tape (cloth-based, used to hold foam in a container; not paper stem-wrap)
- Wire coat hanger
- About six 4-inch wired wood picks or similar
and
- Sink or tub of water
- 24-gauge wire (or similar)
Plant Materials
Assortment of evergreen clippings such as
- Cedar
- Holly
- Eucalyptus
- Camellia
- Magnolia
- Pine
- Pittosporum
- Southern wax myrtle
- Juniper
- About three pine cones
- Three to six berry sprays (holly, nandina)
Step-by-Step Instructions
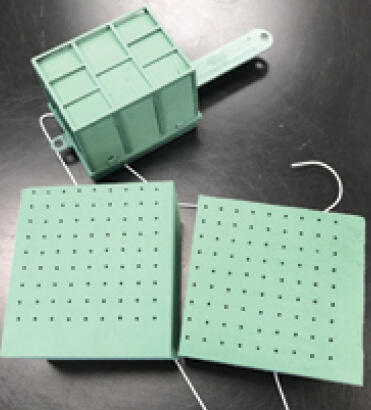
A commercially prepared cage of fresh floral foam (top) has grommets or holes on both ends, which help to secure the finished design to a hook or nail. You can make an improvised cage from a fresh floral foam brick cut in half and a wire coat hanger (bottom).
If you are making the mechanic, follow these steps:
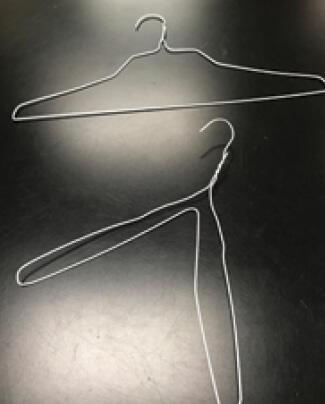
Step 1. Bend the wire hanger’s horizontal bar in half to resemble bunny ears.
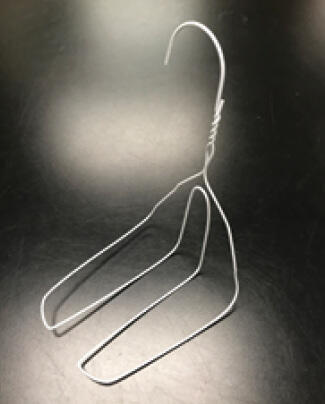
Step 2. Bend the ears so that they are closer together, then bend the frame to create a back.
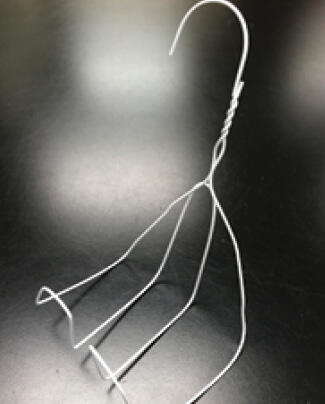
Next, bend the tips of the bunny ears upward so that the mechanism can hold the foam brick. You can gauge the size of the basket by temporarily placing the foam into the holder.
The hanger’s hook can be used to hang and display the finished design. You can crimp it into a tighter hook shape. Just be sure that the end of the wire is away from the
door so it won’t scratch its surface.
Step 3. Add an impervious plastic backing to the swag cage mechanic. This will keep the wet foam away from the door or wall surface where it will be displayed, eliminating water damage. This example uses vinyl drawer lining material cut to the appropriate size, but you can use a plastic bag or similar item.
Step 4. Wrap the foam/wire/plastic backing unit with waterproof tape. Start around the outside of the brick and wrap firmly, without damaging the fragile foam, around the entire brick twice, creating two layers of thickness.
Next, add two parallel bands of the tape on the front of the brick. It is best to use at least two layers, preferably three, to create a durable cage of tape.

Step 5. Once you are ready to make the design, it is time to hydrate the fresh floral foam. Immerse the entire cage by merely dropping it on the surface of the water. Do not force fresh floral foam below the water line. This action may create a “dry core” where water has not penetrated the center portion of the brick. Merely place the foam unit on the surface of the water. The “free float” method is quick, taking only about 30 seconds for the brick to be fully hydrated and ready for use.

Step 6. Using precut lengths, wrap and twist florist wire through the cones’ scales. Make the twist at the halfway point of the wire so that the arms of the wire are approximately the same length. Wire these to the wooden picks. You can add some of the waterproof tape over the wire to secure it in place.
Secure long evergreen stems to a wired wood pick to keep them from falling out of the foam, especially those that hang downward in the design. Notice how the wire is attached. The first revolution goes around the fresh stem only. Successive revolutions spiral around the stem and the pick until the wire ends.
Step 7. Begin by adding greenery placements to the top and bottom (north and south) of the design. Note that the cascading form of this design requires shorter stems on the top and longer branches at the bottom. Also note that these stems should be inserted toward the back of the brick.
Remember, floral foam is a non-decorative mechanic; therefore, it must be completely covered. If you place your greenery properly—beginning toward the back of the brick and working forward—the design will not have an unbalanced look or appear to be falling forward.
Step 8. Continue to build the geometric form of the design by making placements of the same length to the left and right (west and east).
Step 9. Bridge the placements between the north, south, east, and west ends by adding materials to form a diamond shape. Continue to add materials to the outer edge of the design and try to avoid the center until you have achieved the desired outline or pattern.
Step 10. Now add materials toward the center. Remember that large cones will be added at the focal area of the design, so keep this area open.
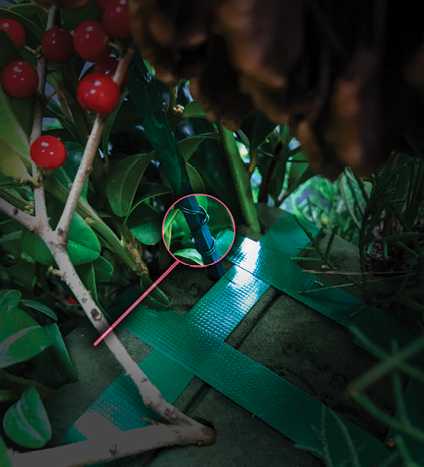
When adding the cones, bend the wire into a V shape and insert the pick just above a horizontal band of tape, then bend the wire so that the cone hangs downward. This will ensure the cone is well-anchored so it will not fall out of the foam. Do you notice that the dark green wood pick is placed above the tape line? This helps to keep the cone from falling out of the design.

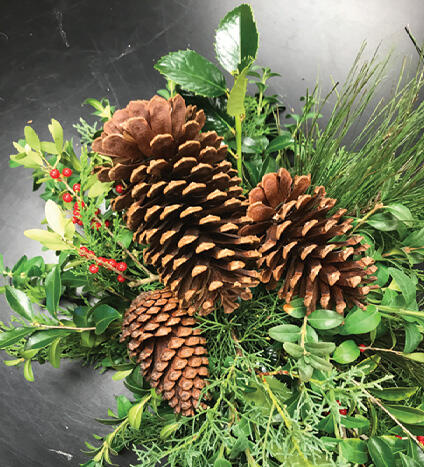
Place the cones as shown here, with the largest cone toward the center.
Step 11. Add smaller branches of greenery and berries in the focal area. These should be some of the last placements made in the design.

It is a good idea to wire the swag to a nail or hook in the door. This will keep it from blowing away in winter storms.
This same design can be attached to a wire easel and used as a cemetery memorial decoration. Be sure to attach the swag at three different points to the easel using wire or waterproof tape.

In the Deep South, there are no effective ways of keeping this design fresh for extended periods of time. Direct sun and heat will dry out the display within a few days. If the weather is cool and rainy, as is often the case, the design will stay fresh for a few weeks. One option is to make two or more swags at the same time. Keep extras in large plastic bags in a refrigerator. Stored this way, they will last for many weeks.
Publication 3247 (POD-06-24)
By James M. DelPrince, PhD, AIFD, PFCI, Associate Extension Professor, Coastal Mississippi Research and Extension Center.
The Mississippi State University Extension Service is working to ensure all web content is accessible to all users. If you need assistance accessing any of our content, please email the webteam or call 662-325-2262.
Download

P3247
Creating an Evergreen Swag
3.74 MB
Authors
-
 Associate Extension Professor
- CREC-Coastal Research & Ext Center