P3249
“The Process” of Archery
Archery, like all of the shooting sports, involves a series of steps to execute a well-placed shot. These steps are referred to as “the process.” The process is an individual’s shooting style and ability to concentrate and replicate those steps each time. Different people have different processes. Pay attention to other people so you can pick up on tips and methods they use.
Foot Position
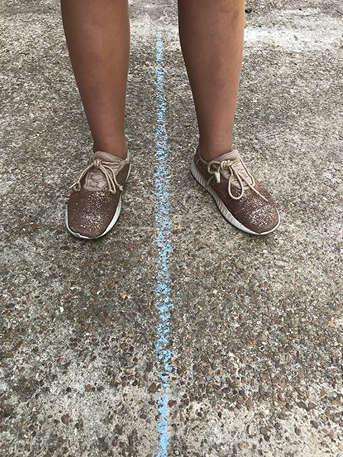
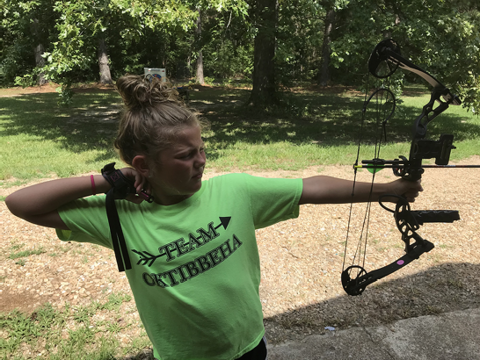
Foot position and balance are critical to learning your process. Start with your feet shoulder width apart at a right angle to the target. When standing at the target line, you should have a foot on either side and your feet should be horizontal to the target line. Your dominant foot is the one that is across the line on the same side as the target. Point your dominant foot slightly toward the target. This will “open your stance” a bit and allow your bow arm to pass your body and your draw arm to consistently pull the string to your eye.
No specific foot position is correct. You have to find the foot position that works best for you. Some prefer a more open stance, some more closed. Shooting in the various foot positions will allow you to find what gives you the consistency you need.
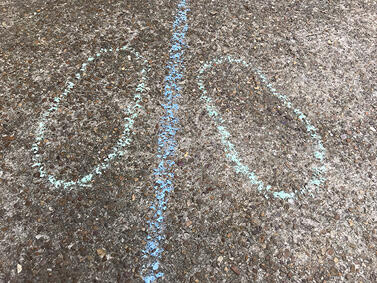
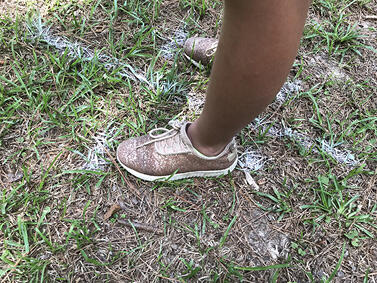
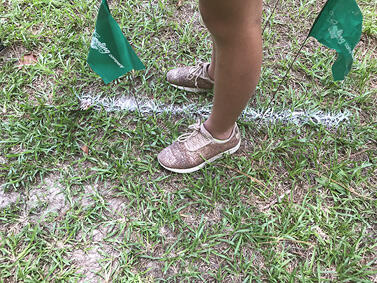
Once you have settled on the foot position that works for you, you should mark where each part of your foot goes. On concrete, take some sidewalk chalk and have someone outline your feet. If you are on grass, you can use spray paint or small wire flags.
Remember that your body should be erect and not slouched. Lazy backs result in lazy execution of shots and less-than-desirable results!
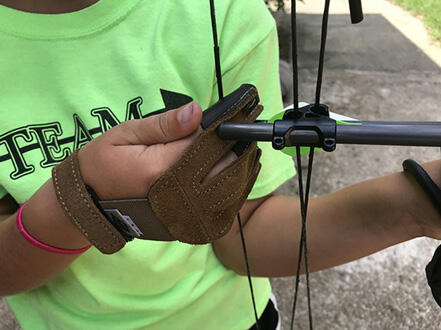
Bow Arm Position
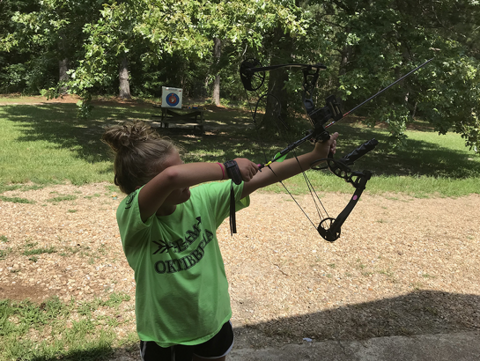
Your bow arm is the arm/hand that holds the bow. Once you have loaded the arrow into the bow, extend your bow arm and point it toward the target. Along with your bow arm, your draw hand should be on the string. In this position, your body forms the shape of a T. You are now in position to pull (draw) the bow string back.
If your bow is dramatically raised when you pull the bow string back to position (“sky drawing”), your pull weight probably needs to be reduced. If your bow’s draw weight is too high, you will not be able to settle into the shot and you will become fatigued very quickly. Remember, a faster arrow means nothing if you can’t make consistent shots.
Anchor Point
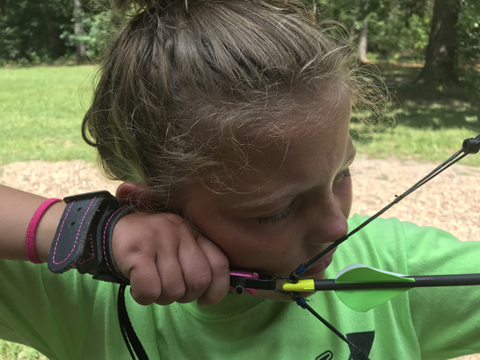
Once you draw the bow string, it is very important that the string return to the same spot on your face time after time. This is known as your anchor point. A good set of anchor points could be the string touching the tip of your nose and resting in the corner of your mouth. This gives you two points of reference; however, depending on the style of draw and release used, these anchor points may change. Find what is comfortable and effective, and stick with it.
Sighting
Whether you use an actual sight pin or shoot instinctively, the process of sighting is the same. Settle on a point of aim on the target. Not doing so results in “snap shooting,” or releasing the arrow the moment the sight is aligned with the target. This can become a bad habit, so you need to correct it right away. Remember: You don’t have to shoot simply because you drew your bow. If you’re not settled in for the shot, let the string back down, re-nock the arrow, and begin the process again.
As in all shooting sports, once the energy of the shot is released, it can never be taken back. Concentrate on the target, and place the arrow where it should be. A good exercise is to draw the bow back, settle in for the shot, and then let the bow down. Try counting to five. If you practice this enough, you’ll soon realize that you’ve replaced a bad habit with a good one!
Executing the Shot
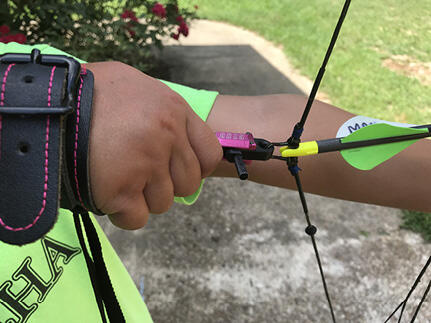
Executing the shot is releasing the string or “firing” the bow. Regardless of the type of release (mechanical or fingers), the procedure for release is the same. A good release consists of a slow and steady letting go of the string. If you are using a mechanical release, squeeze the trigger with slow and steady pressure; do not punch or snap-shoot the trigger. If you are using your fingers, the string should leave as if it were sliding out of all your fingers at the same time.
Another method of release is called back tension. At full draw, with your fingers on the string or trigger, slowly squeeze your shoulder blades together until the string leaves the release method. This method allows you to concentrate more on sighting the arrow and less on the release.
Follow-Through
The next step in the process is following through with the shot. Think about basketball players shooting the ball. Notice how they leave their hand bent at the wrist until the ball goes into the rim? The same principle is used in archery. To follow through, you must keep your bow/bow arm extended for a brief period of time after the shot. Any jerking movement as the arrow is released can lead to shots flying left or right. One indicator of dropping the bow arm too soon is shots hitting low on the target.
A good way to know if you are following through is to ask yourself, “Did I see the arrow fly into the target?” If the answer is no, then you did not follow through. Watching the arrow hit the target and briefly holding your bow arm out decreases unnecessary movement that can result in inaccurate shots.
Reflection
To complete the process, you must reflect on your shot. Ask yourself these questions:
- What was the result of following the process? In other words, where did the arrow strike the target?
- What did you do or not do during the process that led to the resulting shot?
- What can you do to either repeat the process or change it to improve the next shot?
Reflection allows you to exercise your critical-thinking skills and begin to tailor your process to fit your style of shooting.
Each archer can take the process and expand on it. These are not hard-and-fast rules but merely points to ponder. Keep an open mind, try these steps, and know that each shot is separate from the previous one. Mentally conquer the process, and you will find that your mind is at one with the bow as well as the shot you execute.
Publication 3249 (POD-12-25)
Reviewed by Reid Nevins, Extension Specialist I, 4-H Youth Development. Written by John Long, PhD, former Assistant Extension Professor, 4-H Youth Development.
The Mississippi State University Extension Service is working to ensure all web content is accessible to all users. If you need assistance accessing any of our content, please email the webteam or call 662-325-2262.
Download

P3249
“The Process” of Archery
1.46 MB
Departments
Authors
-
 Extension Specialist I
- Ctr 4-H Youth Development