P1422
4-H Forestry Project No. 3: Collecting and Identifying Tree Seeds
Trees are an abundant, natural resource in Mississippi. The “job” of every tree is to create more trees to keep the forests alive. If a tree species does not reproduce, it will disappear over time. Like most plants, trees produce seeds to reproduce. Studying seeds is fun and can help you understand the concept of “ecology,” which is the relationship between living organisms and their environment.
Why Study Tree Seeds?
Collecting, identifying, and showing tree seeds in an exhibit is a great way to learn about reproduction of different tree species. This and other 4-H forestry projects are also fun! The project can be used in visual presentations at 4-H events, county fairs, and school to gain recognition and improve your public speaking skills.
Several events must happen at the right time and in the right order for trees to produce healthy seeds. Factors that can affect a tree’s ability to make seeds include:
- Health – If the tree is not healthy, it may not produce enough or any seeds.
- Age – Many species of trees take as long as 30 years to reach reproductive age, while others produce seeds in 3 or 4 years.
- Weather – When tree flowers are in bloom, sudden changes in weather can destroy seeds before they form.
- Pests – Outbreaks of insects and diseases can damage seeds or prevent them from developing.
Tree seeds come in a variety of shapes, sizes, and colors. Maple and pine seeds, for example, have papery wings to catch the wind and scatter over long distances. Willow and cottonwood seeds have long, hair-like fibers that allow them to float on water and through the air for long distances.
Some tree seeds rely on animals to help them get around. Squirrels and mice hide acorns, walnuts, and hickory nuts in the ground, old logs, and tree stumps, which are ideal growing spots for these tree species. Small acorns are also hidden by small species of birds sometimes. Cherries, dogwood berries, and holly berries are brightly colored and attract birds. Once birds finish eating the fruit, they fly away and spread the seeds wherever they perch. Some trees always “seem” to grow along fences because birds and other animals continually drop seeds there.
Let’s get started on your exhibit!
References to Check
Know Your Trees. Mississippi State University Extension Publication 146. Request a copy of this publication from your local Extension office.
Mississippi Trees [PDF download]. Mississippi Forestry Commission. Download the smartphone app or view the PDF.
Woody Plant Seed Manual. USDA Forest Service Agricultural Handbook No. 727, 2008.
For additional help, visit the MSU Extension Forestry page.
People with Answers
- MSU Extension agents or forestry specialists
- Mississippi Forestry Commission area foresters
- USDA Natural Resource Conservation Service district conservationists
- U.S. Forest Service project foresters or district rangers
- Industry foresters with local paper or wood manufacturing industries
- Self-employed consulting foresters
- Garden clubs and conservation groups
Materials You Need
- Poster board (32 by 40 inches)
- Stiff cardboard or 1/4-inch plywood (32 by 40 inches)
- Felt-tipped marker
- Wood glue
- Old magazine or squares of cardboard (12 by 12 inches)
- 10 sheets of copy paper (8.5 by 11 inches)
- Two pieces of fiberboard (12 by 12 inches) to form a leaf press
- 12 feet of 3/4-inch molding
- Leaves, fruits, and seeds of five major tree species in Mississippi
- Five index cards (3 by 5 inches)
- Black pen
- Sharp knife or small saw
Steps to Follow
- Choose five tree species you would like to study. Find one of each species with low branches to make seed collection easier. You may want to choose species you have in your yard, near your house, or at school. Always ask the landowner’s permission before collecting your samples.
- Learn the common and scientific names of each tree species you have selected, and list what type of fruit, berry, or nut it produces. The seeds may be large and easy to recognize, like acorns, or they may be contained inside a cone or fruit, like pine cones or persimmons. Learn what habitat type each tree prefers.
- Once you make your choices and find the trees, wait until seeds mature before collecting them. Plan your exhibit while the seeds are growing.
- Collect one to three leaves from each tree species you will exhibit. Refer to MSU Extension Publication 146 Know Your Trees to be sure you have collected a representative leaf sample. Some trees have simple leaves (a single blade) and others have compound leaves (several separated segments).
- Dry and press leaves in preparation for mounting on your exhibit. Flatten the leaves between two pieces of copy paper (Figure 1). Place the paper containing the leaves in an old magazine (Figure 2) or between two pieces of cardboard (Figure 3). You can press several leaves in one magazine.
- Insert the magazine or cardboard between two 12-by-12-inch pieces of fiberboard (Figure 4). Place straps or weights (about 10 pounds) on the boards. The pressure forces the leaves to dry smoothly and evenly.
- Make your exhibit board by gluing white poster board (32 by 40 inches) on one side of a piece of heavy cardboard or a piece of 1/4-inch plywood or fiberboard. This gives an exhibit enough strength to hold its shape.
- Frame the exhibit with 3/4-inch molding.
- Gather your reference materials. Prepare a 3-by-5-inch index card for each species (Figure 5). Type or print clearly the common name, scientific name, and brief description of the habitat in which each species grows. Describe how the seeds grow. List when the tree flowers, what type of fruit is formed, when the seeds mature, and how the seeds are dispersed. Store your cards in a clean, safe place until you are ready to put the exhibit together.
- Title your exhibit “Tree Seed Identification.” Write or type the title in block letters 11/2 inches high and about 1 inch from the top of the board.
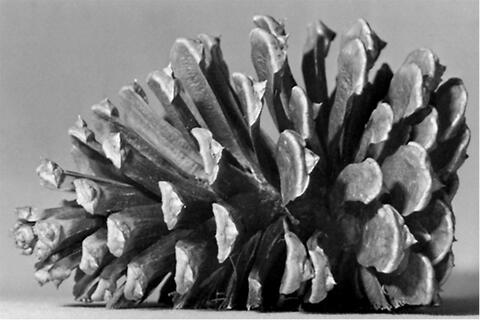
- Once fruit has matured, collect it and separate the seeds from the fruit. For example, dry pine cones so they open and the seeds fall out. Save the fruit and seeds. If you choose persimmon (or another soft-fruited tree), crush some persimmons to get clean seeds, and dry other whole persimmons for the fruit portion of your exhibit. You can air-dry fleshy fruits by placing them on a rack in the sun and wind. If you don’t want to dry the fruit, take a photo to use on your exhibit.
- Now you have all the materials you need to make your tree seed exhibit. However, the fruits are not quite ready to mount. Preparing the fruit for mounting requires that you cut it lengthwise. Figure 6 shows the proper way to cut the fruit. Be careful while using a knife or small saw to make your cuts.
- First, place your leaves, fruit (or photograph), seeds, and completed index cards on the board without glue. Check to be sure all materials fit on your exhibit properly before gluing.
- Start at the bottom and work your way up. Mount your index card first by gluing it 1 inch above the molding at the bottom of your exhibit. Next, glue several seeds 1 inch above the index card; use about a 4-inch space for your seeds.
- Mount the fruit or the picture of the fruit about 1 inch above your seeds. Allow about 6 inches for the fruit display.
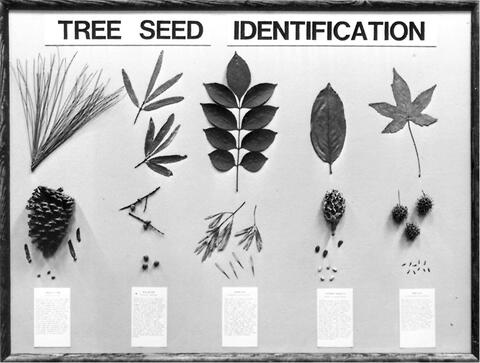
- Mount the leaf sample. Glue your leaf in the space above the fruit sample and below the exhibit title. Now repeat steps 12 through 15 for each of the other species you want to include in your exhibit. When you are finished, your project should look like the exhibit in Figure 7.
- Now that your exhibit is complete, use it for a visual presentation at a club meeting or at school. You may want to use the exhibit as a window display or at a county fair.
- If you enjoyed learning about tree seeds and the way trees produce them, you may want to make another exhibit.
- If possible, have someone take a picture of you and your finished exhibit. You may want to include a photograph in your 4-H member’s record.
- If possible, get a local forester to check your exhibit and sign your record sheet when your project has been completed. Include the record sheet in your current year’s record book.
- Save this project sheet and other materials for future reference as you participate in other 4-H forestry projects.
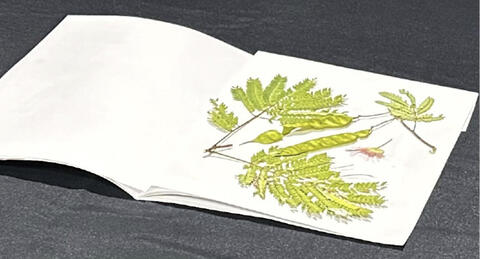


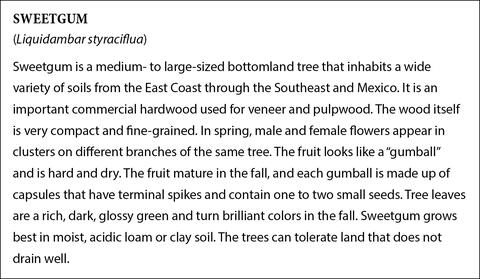
Figure 5 text: SWEETGUM (Liquidambar styraciflua). Sweetgum is a medium- to large-sized bottomland tree that inhabits a wide variety of soils from the East Coast through the Southeast and Mexico. It is an important commercial hardwood used for veneer and pulpwood. The wood itself is very compact and fine-grained. In spring, male and female flowers appear in clusters on different branches of the same tree. The fruit looks like a “gumball” and is hard and dry. The fruit mature in the fall, and each gumball is made up of capsules that have terminal spikes and contain one to two small seeds. Tree leaves are a rich, dark, glossy green and turn brilliant colors in the fall. Sweetgum grows best in moist, acidic loam or clay soil. The trees can tolerate land that does not drain well.
See the PDF above for the 4-H Forestry Project No. 3: Collecting and Identifying Tree Seeds record sheet.
Publication 1422 (POD-09-24)
Revised by James Shannon, Extension Specialist I, North Mississippi Research and Extension Center, from earlier editions by A. Brady Self, PhD, Extension Professor, Forestry, and Andrew J. Londo, PhD, former Extension Professor, Forestry.
The Mississippi State University Extension Service is working to ensure all web content is accessible to all users. If you need assistance accessing any of our content, please email the webteam or call 662-325-2262.
Download

P1422
4-H Forestry Project No. 3: Collecting and Identifying Tree Seeds
576.24 KB
Authors
-
 Extension Professor
- Forestry
-
 Extension Specialist I
- North MS Research and Extension Ctr